Posts

Showing posts from 2018

Art on a Cart Art Lesson

Image
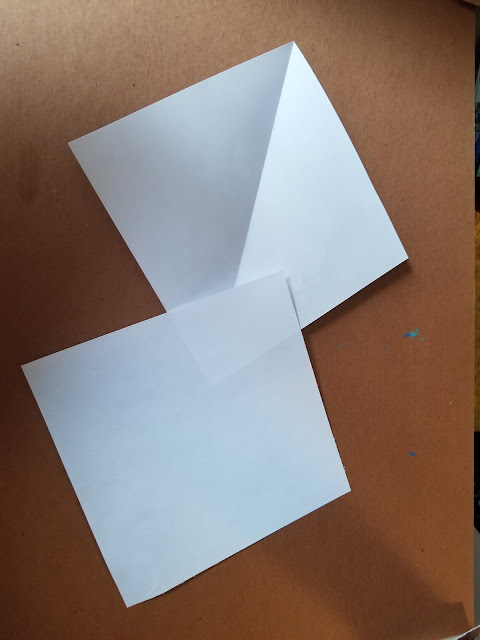
Art on a cart is not an easy task, and my heart goes out to all art teachers who are full time on a cart. I have my share of days when my room is being used for what ever reason, but I wanted to share a lesson that seems to be a kid pleaser when I have to do art in the classroom. This lesson was taught to 3rd-5th graders but it could easily be done with first and second. Supplies needed: 9 x 9 inch white paper (2 for each student) Markers Crayons Pencils Erasers Origami Dogs or Cats Fold one paper in half  leave the other for later. Fold the two corners of your paper to create ears. Now take the bottom pointed area and flip it up to create the nose/mouth.  Your second sheet should now be folded in half like a triangle bend the bottom to the side for a tale. Use a glue stick and glue the head to the body and decorate!  I usually bring makers with me on my cart but since I am in their classroom. I let them get out there crayon and marker

Circle Creatures

Image
This lesson was inspired by  the creativity of  http://kidslovecraft.blogspot.com .  I call this cute lesson "Circle Creatures",we focused on the shapes particularly the circle. This gave my first graders practice tracing and drawing circles.   Supplies used: 12 x 18 inch construction paper (variety of colors) 4 x 5 inch white paper and black paper 6 x 6 red paper Scissors Glue Pencils We started with one 12 x 18 inch piece of construction paper folded in half.  I gave each table a laminated circle to use as a stencil. We've learned in class that if you fold your paper in 1/2 you will get two of the same objects. So, we traced our circles and cut them out. This always get excited when they see 2 shapes come out. Next, one of the circles is folded in 1/2. The kids used the cue "fold it like a taco", it worked, and they remembered.  We glued the "taco" to the other circle to form the mouth. Next, we took w

Spider Webs

Image
 I love this lesson! It teaches students how to use lines in a picture. And what better way than to teach students how to make a spider web. It's a great review of types of lines. We covered straight and curved lines in this lesson, of course they love it! Supplies used: 9 x 12 inch white paper white oil pastel (white crayon) Black or blue liquid water color Brushes For this lesson I did a teacher led demonstration on how to draw a spiderweb using a pencil. I love to practice before going straight into a lesson. Especially something like this with first grade. So, day 1 is practice. Day 2 they show me what they have learned by using a white oil pastel to draw their spider web, and yes you can see it on the white paper. Once they have drawn their spider web it's time to add the liquid watercolor. I have three first grade classes to do this with so recycling the liquid watercolor works. My example Adding the spider Once they were dry we used black

Student Art Portfolios

Image
This year I am trying very hard to get my students to be data minded and presentation ready. My 5th-8th grade students are building portfolios this year. To keep things simple and not get so overwhelmed, I am making them out of large 18 x 24 inch white paper simply folded in half. On the cover students will decorate and design their name. My example  On the inside cover I have created a Student Data Sheet where students will enter their grades and create a bar graph to see there growth and what areas they have already mastered. Now mind you, this is my second year doing this and I'm still revamping this sheet but so far its simple and the kids can manage it without my assistance. We simply taped it on the inside cover.   https://1drv.ms/w/s!Asp9n-oM03mC9FmMkp0P7AXp4Hwb . Here's a link to the Data sheet. Feel free to use and make your necessary changes. Data Sheet Inside of their portfolios we will keep each graded artwork. All portfolios are stored in a large

Graffiti Name Design

Image
        Sometimes it can be difficult trying to create lessons that will engage middle school students. This lesson is from a workshop that I did using modeling paste to create textured paintings. Since I have a lot of boys in my class that love graffiti I thought "Why not?", lets create our own graffiti walls. So we did! We used Modeling paste and a brick wall stencil to create the wall and while that was drying we learned to create graffiti names. Check out the videos and images below of there amazing work. Supplies used:  Flexible Modeling paste Cardboard any size Palette Knife Tempera paint (red) (black) brushes Sticky foam cubes Glue White 8 x 11 inch Tag board Scissors Markers Colored Pencils Crayons Painting our brick walls  Adding shadows to create dimension   Cutting out our names Here are few completed projects.

Art Supply Organization

Image
This year my goal is to make my room more streamed lined. So I found these great baskets at the dollar store. Unfortunately, they only come in three colors, so Rust-Oleum to the rescue! I painted three baskets to coordinate with my table colors in the room. So I now have my warm and cool color baskets. Here's what's going in the baskets, each table will have wipe boards, expo markers w/erasers, crayons, scissors, pencils and erasers. I also color coordinated my wipe board erasers and expo markers. Amazon order, 30 wipe boards, markers and erasers. They're a big hit!  The kids loved it!  They were so engaged!

Construction paper cats

Image
 The "Cat's" out the bag folks!  Yes, second starting making construction paper cats. I don't know where I got this lesson but it has been in my bag of tricks for years. It's my go to for second grade.  Its very easy to make and the kids love that they can stand up all by themselves. Supplies used: Construction paper (Neutral colors) 6x6 and one 9x12 Scissors Glue Pencils/Eraser Extra scraps I took a 12 x 18 sheet of paper and split it into two to make my 6x6 inch square and 9x12 inch rectangle Fold 9x12 inch sheet in half Near the open portion of the folded paper draw a circle and cut it out. Add a tail and extra details Cute!