Posts

Showing posts with the label art projects

Where have you been?

Image
Boy, has it been a while since I have blogged!  Please forgive me...life has been busy. For some of you who do not know, I'm not only a full time K-8 art teacher, but I am a business owner, traveling art content leader for my school,  and outreach art instructor. I travel and participate as an art vendor and  I participate in art shows throughout the year so my mind goes from one place to the other. This year I have traveled to New York to facilitate  an art teacher workshop with some amazing art teachers and I have helped coach over 20 new art teachers during our professional develop training. Whew!! It's been a ride!  Well, I haven't totally left the seen, I'm preparing a few lessons to share on my blog and on YouTube. I have decided to share my classroom video tutorials with you. I love making videos to show my students how to create our art projects. I do have an Elmo in my room that displays what I demo on to the whiteboard, but it gets difficult trying ...
Art on a Cart Art Lesson

Image
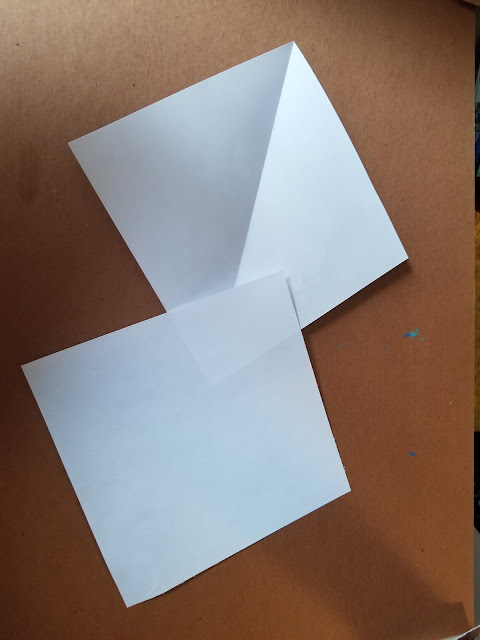
Art on a cart is not an easy task, and my heart goes out to all art teachers who are full time on a cart. I have my share of days when my room is being used for what ever reason, but I wanted to share a lesson that seems to be a kid pleaser when I have to do art in the classroom. This lesson was taught to 3rd-5th graders but it could easily be done with first and second. Supplies needed: 9 x 9 inch white paper (2 for each student) Markers Crayons Pencils Erasers Origami Dogs or Cats Fold one paper in half  leave the other for later. Fold the two corners of your paper to create ears. Now take the bottom pointed area and flip it up to create the nose/mouth.  Your second sheet should now be folded in half like a triangle bend the bottom to the side for a tale. Use a glue stick and glue the head to the body and decorate!  I usually bring makers with me on my cart but since I am in their classroom. I let them get out there cra...

Student Art Portfolios

Image
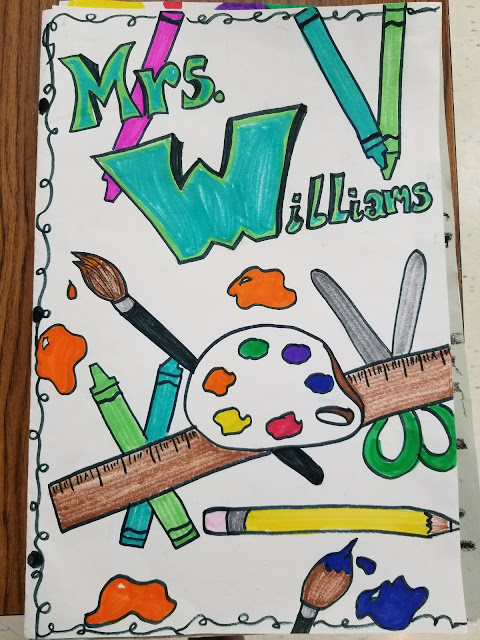
This year I am trying very hard to get my students to be data minded and presentation ready. My 5th-8th grade students are building portfolios this year. To keep things simple and not get so overwhelmed, I am making them out of large 18 x 24 inch white paper simply folded in half. On the cover students will decorate and design their name. My example  On the inside cover I have created a Student Data Sheet where students will enter their grades and create a bar graph to see there growth and what areas they have already mastered. Now mind you, this is my second year doing this and I'm still revamping this sheet but so far its simple and the kids can manage it without my assistance. We simply taped it on the inside cover.   https://1drv.ms/w/s!Asp9n-oM03mC9FmMkp0P7AXp4Hwb . Here's a link to the Data sheet. Feel free to use and make your necessary changes. Data Sheet Inside of their portfolios we will keep each graded artwork. All portfolios are stored in a large...

Graffiti Name Design

Image
        Sometimes it can be difficult trying to create lessons that will engage middle school students. This lesson is from a workshop that I did using modeling paste to create textured paintings. Since I have a lot of boys in my class that love graffiti I thought "Why not?", lets create our own graffiti walls. So we did! We used Modeling paste and a brick wall stencil to create the wall and while that was drying we learned to create graffiti names. Check out the videos and images below of there amazing work. Supplies used:  Flexible Modeling paste Cardboard any size Palette Knife Tempera paint (red) (black) brushes Sticky foam cubes Glue White 8 x 11 inch Tag board Scissors Markers Colored Pencils Crayons Painting our brick walls  Adding shadows to create dimension   Cutting out our names Here are few completed projects.

Construction paper cats

Image
 The "Cat's" out the bag folks!  Yes, second starting making construction paper cats. I don't know where I got this lesson but it has been in my bag of tricks for years. It's my go to for second grade.  Its very easy to make and the kids love that they can stand up all by themselves. Supplies used: Construction paper (Neutral colors) 6x6 and one 9x12 Scissors Glue Pencils/Eraser Extra scraps I took a 12 x 18 sheet of paper and split it into two to make my 6x6 inch square and 9x12 inch rectangle Fold 9x12 inch sheet in half Near the open portion of the folded paper draw a circle and cut it out. Add a tail and extra details Cute!