Posts

Showing posts with the label middle school

Stuffed Felt Project

Image
This lesson is a real hit with my middle school students. We learned to create a stuffed felt pillow. I have used a variety of themes for this project but the list is limitless. I have done stuffed emoji's, and winter holiday characters you can have your students create all kinds of things. Our first step is to create a template of there design using carboard or paper. It must be large enough to fill with stuffing and able to be sewn or glued around the edges to seal shut. Pick two sheets of felt and trace your template onto the felt. Cut out your design and begin adding details.  Connect your two pieces with needle and thread, hot glue or fabric glue. My students used needle and thread as this was a sewing project for them but I have used hot glue guns with them when we are in a time crunch.  The hot glue or fabric glue can be used to add embellishments too. Below are some pics of my Art ED colleagues at a PD that I facilitated. I introduced this lesson to them to take ...
Chris Riggs Heart Art

Image
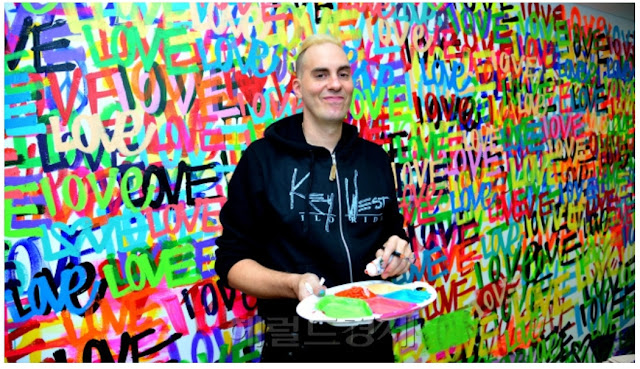
One of my favorite modern/Instagram artist to teach about is Chris Riggs, his work is simple but edgy and has a great message of love. I decided to use his layering style in a cut paper collage project for my middle school students. I used a video to demonstrate the cutting technique and once they got that, the rest was history.   Supplies needed: 12x18 Black or white construction paper 5x5 inch construction paper variety of colors Scissors Glue Pencil and eraser   Loved how students tried new shapes to create their design. 

Where have you been?

Image
Boy, has it been a while since I have blogged!  Please forgive me...life has been busy. For some of you who do not know, I'm not only a full time K-8 art teacher, but I am a business owner, traveling art content leader for my school,  and outreach art instructor. I travel and participate as an art vendor and  I participate in art shows throughout the year so my mind goes from one place to the other. This year I have traveled to New York to facilitate  an art teacher workshop with some amazing art teachers and I have helped coach over 20 new art teachers during our professional develop training. Whew!! It's been a ride!  Well, I haven't totally left the seen, I'm preparing a few lessons to share on my blog and on YouTube. I have decided to share my classroom video tutorials with you. I love making videos to show my students how to create our art projects. I do have an Elmo in my room that displays what I demo on to the whiteboard, but it gets difficult trying ...

Student Art Portfolios

Image
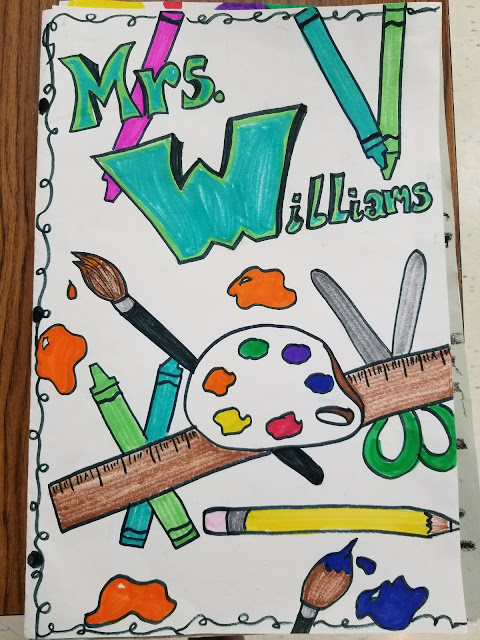
This year I am trying very hard to get my students to be data minded and presentation ready. My 5th-8th grade students are building portfolios this year. To keep things simple and not get so overwhelmed, I am making them out of large 18 x 24 inch white paper simply folded in half. On the cover students will decorate and design their name. My example  On the inside cover I have created a Student Data Sheet where students will enter their grades and create a bar graph to see there growth and what areas they have already mastered. Now mind you, this is my second year doing this and I'm still revamping this sheet but so far its simple and the kids can manage it without my assistance. We simply taped it on the inside cover.   https://1drv.ms/w/s!Asp9n-oM03mC9FmMkp0P7AXp4Hwb . Here's a link to the Data sheet. Feel free to use and make your necessary changes. Data Sheet Inside of their portfolios we will keep each graded artwork. All portfolios are stored in a large...

Graffiti Name Design

Image
        Sometimes it can be difficult trying to create lessons that will engage middle school students. This lesson is from a workshop that I did using modeling paste to create textured paintings. Since I have a lot of boys in my class that love graffiti I thought "Why not?", lets create our own graffiti walls. So we did! We used Modeling paste and a brick wall stencil to create the wall and while that was drying we learned to create graffiti names. Check out the videos and images below of there amazing work. Supplies used:  Flexible Modeling paste Cardboard any size Palette Knife Tempera paint (red) (black) brushes Sticky foam cubes Glue White 8 x 11 inch Tag board Scissors Markers Colored Pencils Crayons Painting our brick walls  Adding shadows to create dimension   Cutting out our names Here are few completed projects.

PLAYING TAG WITH MIDDLE SCHOOL STUDENTS

Image
So have you ever played Tag with middle school students? No, I don't mean running around the room screaming and tapping someone. I'm talking about a fun way for students to peer critic. T.A.G stands for This is inspired by the wonderful art instructors at the Art of Education.   How it works? First my students finish a project and without grading it I placed each paper on the table.  Next to each art project I placed empty sticky notes and a pencil. Each student is to write a TAG for the art piece that is in front of them. Now, of course you may have absent students or students who do not do the project, so for those students I make them TAG a project even if someone has already tagged it, (so there may be two people tagging one piece of art work).  More than one piece of feedback is great.  Students can start when the music begins, when the music stops they stop and TAG the piece that's in front of them. We repeat the process 3-4 more times....

Scratch Art

Image
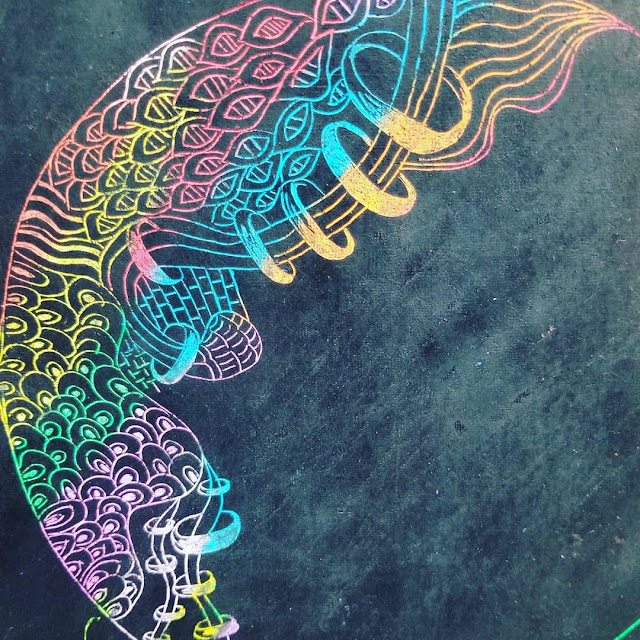
We have all used a scratch board or made one at some point in our early learning or art teacher  careers. So I thought I'd try it again cause I think its fun and my current students have not tried the process yet. This  lesson can be used for any grade level. I used this with my 6th-8th grade students.  I created a short video tutorial for my students so they could see the process. I've shared it below.  I'm starting to have fun creating these videos! On the positive, it gives me a chance to save my voice, and sometimes its hard to demo with a large class. I want everyone to see even the smallest details, so a video lets all participants see the action.   Supplies Used: 12 x 12 inch White paper Oil Pastel (variety of colors) Black tempera paint (thick is better or good quality) Dish soap Skewers My example used with acrylic paint.  We learned that using washable tempera made the surface thin. So the better the ...

Zentangles

Image
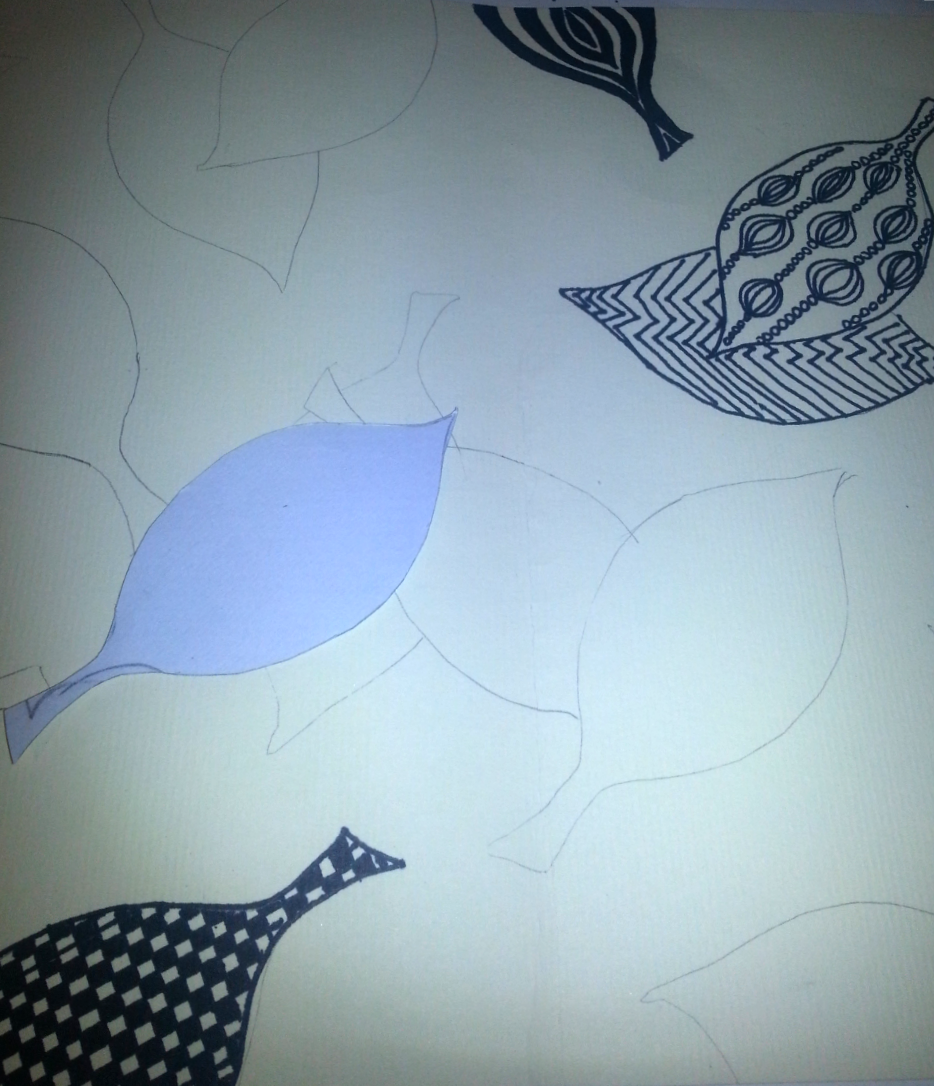
I love Zentangles! While on break I tried a cool leaf design using Zentangle designs inside the leaf pattern. I traced about 7-9 leaf stencils and used a few Zentangle designs in the center of each one. I used a sharpie marker for the outline. Later, I used watercolor for the background and focused on cool colors. I would like to try this lesson out in the future. I can see fourth grade on up doing something like this.

Value Portraits

Image
I like to teach value to my middle school students and one of my favorite lessons is Value Portraits. We start with a simple portrait drawing including the head, neck and shoulders. Students use geometric shapes to break of the simple portrait. Lastly, students choose a color family like warm, cool, primary, secondary to color in each shape. Students must use value in each shape, this is a colored pencil project outlined with sharpie marker. I think that they turned out great.