Posts

Showing posts with the label 6th Grade

Stuffed Felt Project

Image
This lesson is a real hit with my middle school students. We learned to create a stuffed felt pillow. I have used a variety of themes for this project but the list is limitless. I have done stuffed emoji's, and winter holiday characters you can have your students create all kinds of things. Our first step is to create a template of there design using carboard or paper. It must be large enough to fill with stuffing and able to be sewn or glued around the edges to seal shut. Pick two sheets of felt and trace your template onto the felt. Cut out your design and begin adding details.  Connect your two pieces with needle and thread, hot glue or fabric glue. My students used needle and thread as this was a sewing project for them but I have used hot glue guns with them when we are in a time crunch.  The hot glue or fabric glue can be used to add embellishments too. Below are some pics of my Art ED colleagues at a PD that I facilitated. I introduced this lesson to them to take ...
Student Art Portfolios

Image
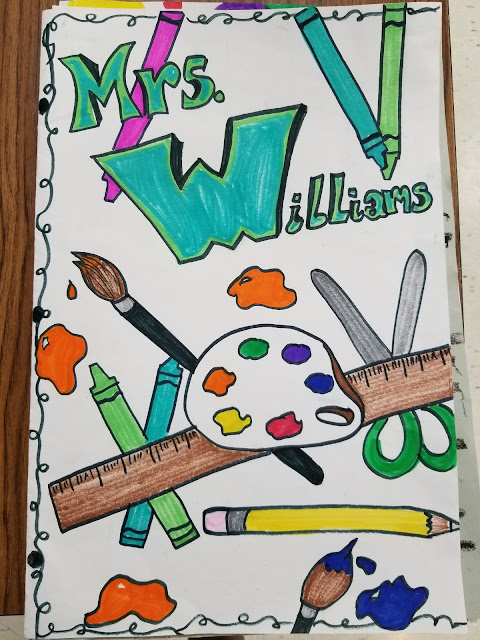
This year I am trying very hard to get my students to be data minded and presentation ready. My 5th-8th grade students are building portfolios this year. To keep things simple and not get so overwhelmed, I am making them out of large 18 x 24 inch white paper simply folded in half. On the cover students will decorate and design their name. My example  On the inside cover I have created a Student Data Sheet where students will enter their grades and create a bar graph to see there growth and what areas they have already mastered. Now mind you, this is my second year doing this and I'm still revamping this sheet but so far its simple and the kids can manage it without my assistance. We simply taped it on the inside cover.   https://1drv.ms/w/s!Asp9n-oM03mC9FmMkp0P7AXp4Hwb . Here's a link to the Data sheet. Feel free to use and make your necessary changes. Data Sheet Inside of their portfolios we will keep each graded artwork. All portfolios are stored in a large...

Graffiti Name Design

Image
        Sometimes it can be difficult trying to create lessons that will engage middle school students. This lesson is from a workshop that I did using modeling paste to create textured paintings. Since I have a lot of boys in my class that love graffiti I thought "Why not?", lets create our own graffiti walls. So we did! We used Modeling paste and a brick wall stencil to create the wall and while that was drying we learned to create graffiti names. Check out the videos and images below of there amazing work. Supplies used:  Flexible Modeling paste Cardboard any size Palette Knife Tempera paint (red) (black) brushes Sticky foam cubes Glue White 8 x 11 inch Tag board Scissors Markers Colored Pencils Crayons Painting our brick walls  Adding shadows to create dimension   Cutting out our names Here are few completed projects.

Scratch Art

Image
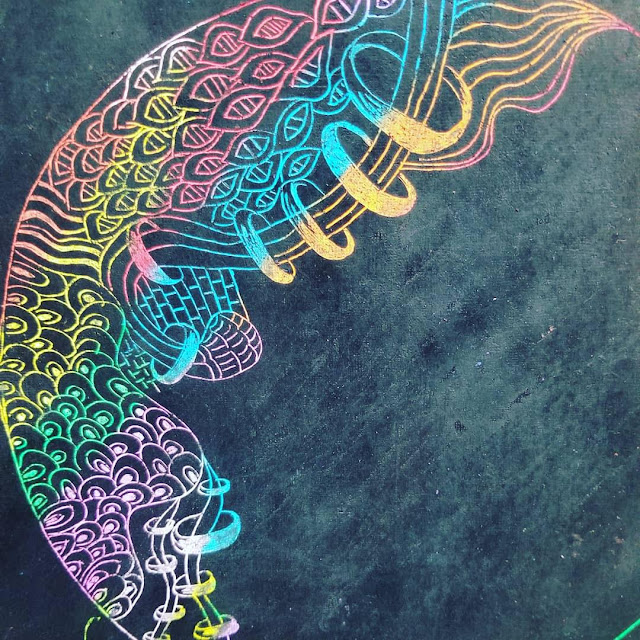
We have all used a scratch board or made one at some point in our early learning or art teacher  careers. So I thought I'd try it again cause I think its fun and my current students have not tried the process yet. This  lesson can be used for any grade level. I used this with my 6th-8th grade students.  I created a short video tutorial for my students so they could see the process. I've shared it below.  I'm starting to have fun creating these videos! On the positive, it gives me a chance to save my voice, and sometimes its hard to demo with a large class. I want everyone to see even the smallest details, so a video lets all participants see the action.   Supplies Used: 12 x 12 inch White paper Oil Pastel (variety of colors) Black tempera paint (thick is better or good quality) Dish soap Skewers My example used with acrylic paint.  We learned that using washable tempera made the surface thin. So the better the ...

Pete Cromer Painted Paper Collage

Image
My Mixed Media 6th, 7th, and 8th grade students just finished this fun painted paper collage inspired by artist Pete Cromer. Check him out on Instagram @PeteCromer or Petecromer.com/ . We started with painting 2 12 x 18 inch paper with colors that would make a great animal design. Once dry we cut our painted papers and began creating some unique animal designs. Below you'll find a few focused learners examples. Supplies Used: 12 x 18 inch white paper Tempera paint (variety of colors) Scissors Glue Pencils Construction paper Brushes Pete Cromer examples My example  My quick video introduction for my Mixed media students.

Construction Paper Portraits

Image
This is a six grade unit on portraits. We learned to draw proportionate portraits, paint portraits and lastly used construction paper to create portraits. I like using units that focuses on using more than one form of media. This helps those students who may struggle with drawing but are great at building with paper or students who struggle with painting but are great at drawing. They all get to excel in at least one form of media. Below are a few of the finished paper portraits.

Angry Bird Clay Project

Image
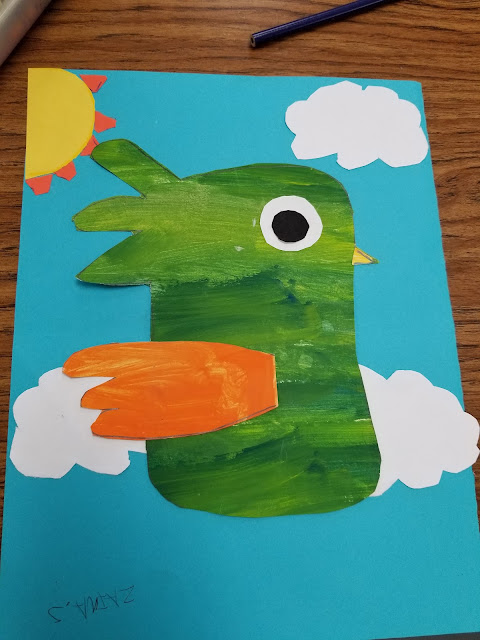
                                  Angry Birds!!! This was a simple lesson on pinch pot methods and hand building with clay. I have three six grade classes that I see each week, and I decided instead of having almost 90 clay projects of the same thing each class created a different clay project. One class created pinched pot snowmen and this one created Angry Birds.  I'm still not sure as to what I want to do with the next sixth grade class. Any suggestions?    We used tempera paint for color and they turned out great. Each one is so different.

Monkey Painting

Image
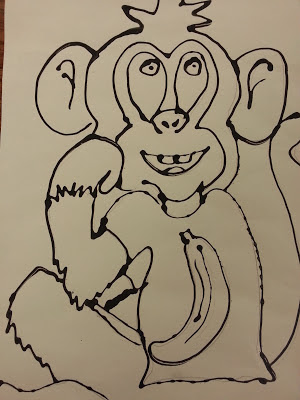
 Here is a quick lesson on Monkey's...I love monkeys!  I did this project with my 6th graders and we focused our lesson on the painting called the Blue Dog byGeorge Rodrigue. Instead of typically doing a dog we discussed as a class what other animals we could do as a series like George Rodrigue. We came up with the Monkey. We started out by drawing sketeches of our monkey using some example sheets that I prepared. We drew our monkey keeping in mind that we wanted to make this memorable, so we added either a unique background or article of clothing to our picture. After drawing it on white 12x18 paper we used black elmers glue and traced our picture. Lastly, after a good drying time we using water color to paint our monkeys. Below is one example of our monkey painting. Things you need: elmers glue mixed with black tempera Watercolor paint (any variety will do) Pencils Monkey images Example of George Rodrigue Blue Dog 12x18 white paper